
Support


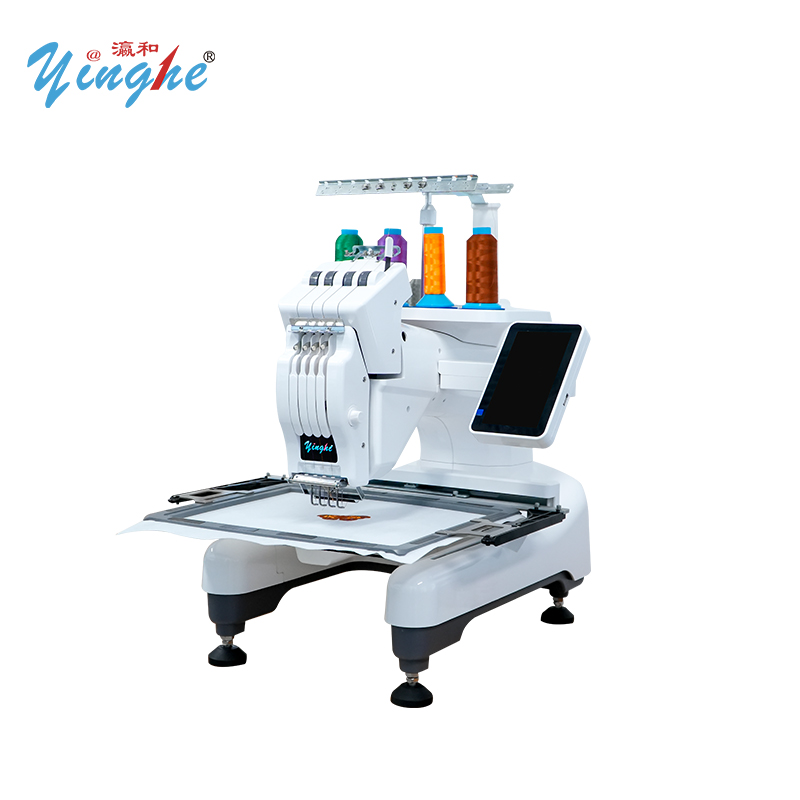
Multi-Function Sewing and Embroidery Machine
Product Parameter:
Product Feather :
Sewing and Embroidery in One YH-ES5 is the ideal machine to start your sewing and embroidery journey. With a modern cosmetic, a host of built-in designs, fonts, patterns, and cutting-edge technology, taking that first step just got easier with the YH-ES5.
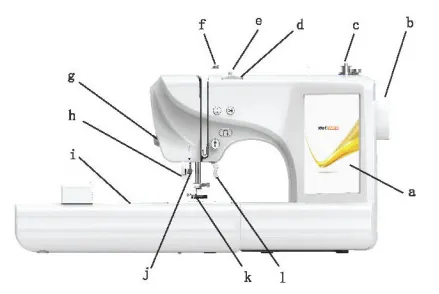
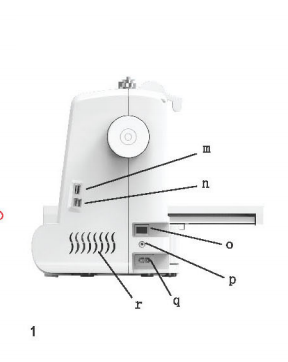
a. LCD Screen: A full-color display interface for selecting stitches, editing patterns, and viewing machine settings and instructions.
b. Handwheel: Manually controls the needle’s up and down movement; turn towards you to raise or lower the needle.
c. Bobbin Winder: Automatically winds thread onto the bobbin evenly and efficiently.
d. Upper Thread Tension Dial: Adjusts the tightness of the upper thread; turn clockwise to increase tension, counterclockwise to decrease.
e. Thread Guide Hook: Guides the upper thread along the correct path during threading.
f. Winding Tension Guide Disk: Regulates thread tension during bobbin winding to ensure smooth and even winding.
g. Thread Cutter: A built-in blade for neatly cutting the upper and bobbin threads after sewing.
h. Buttonhole Lever: Used when making buttonholes to control the length and density of the stitch.
i. Embroidery Unit: An attachable module that enables the machine to perform embroidery functions.
j. Quick Threader: Automatically threads the needle quickly and easily, reducing eye strain.
k. Presser Foot: Holds the fabric in place during sewing; different feet are used for different techniques.
l. Presser Foot Lifter: Raises and lowers the presser foot; can be lifted to two different heights.
m. USB Port: Allows importing of custom embroidery patterns from a USB drive.
n. Debug Port (Do not use): Reserved for factory service and technical debugging; not for user operation.
o. Power Switch: Turns the machine’s power on and off.
p. Foot Controller Socket: Connects the foot pedal for hands-free control of sewing speed.
q. Power Cord Socket: Connects the power adapter to supply electricity to the machine.
r. Ventilation Opening: Allows heat dissipation to prevent overheating during extended use.

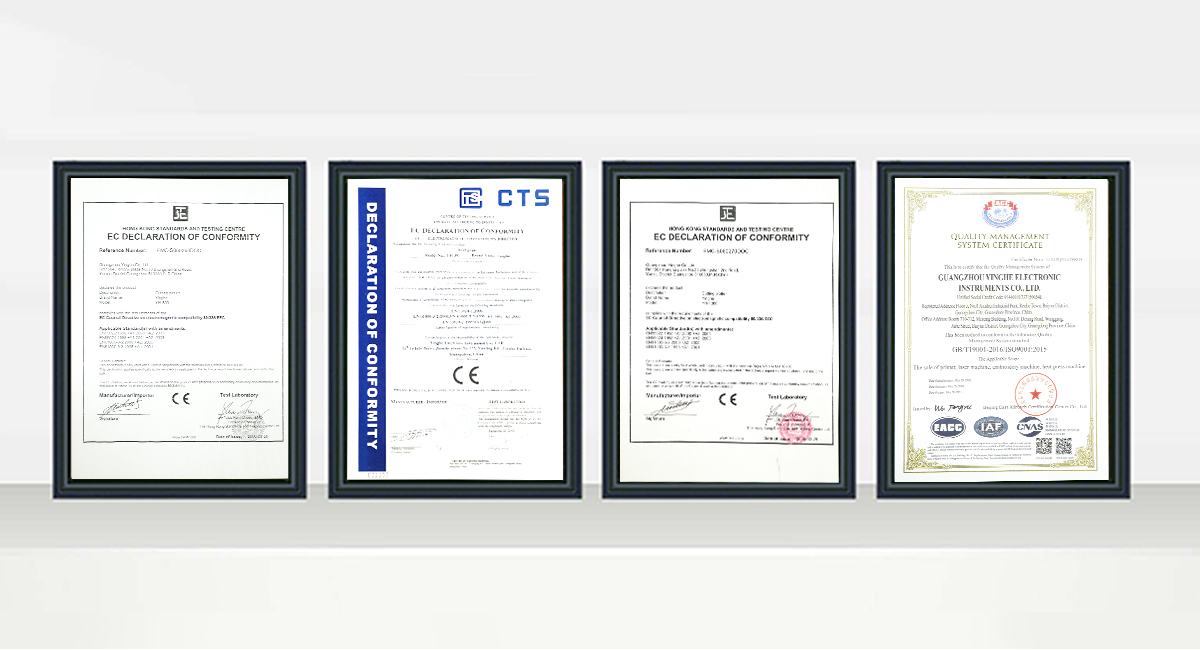
Valid from 08/13/2025 to 08/12/2030
The MD Certificate (EU Machinery Certification) is issuedby an EU Notified Body under Directive 2006/42/ECensuring machinery products meet the EU's rigoroussafety requirements and performance standards. Thiscertification is mandatory for placing machinery on themarket within the European Economic Area and otherregions recognising EU regulations, with a focus on safetyand performance regulations related to machinery designand construction.
Embroidery Machichine's FAQ:
1.How to make pactches with embriodery machine?
1)Digitize your design: You'll need an embroidery file (.pes, .dst, .exp, etc.) designed specifically for your embroidery machine. You can purchase designs online or learn to digitize them yourself.
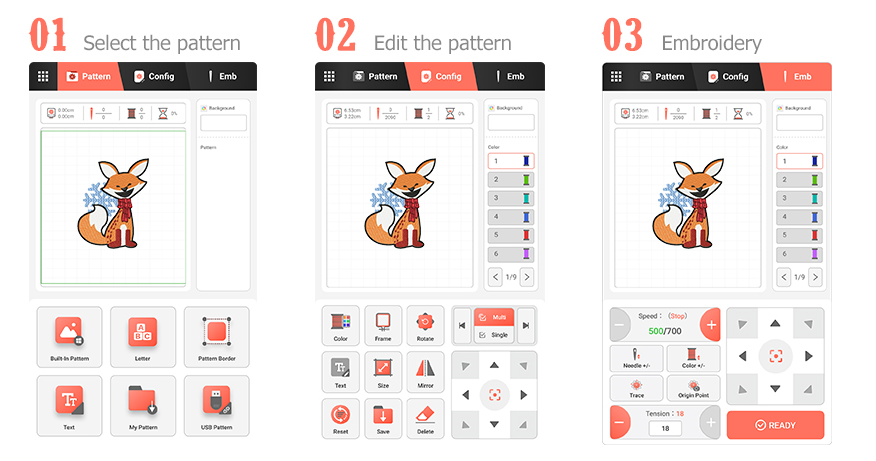
2)Upload your file: Import your file into your machine using a USB drive.
3)Hook the stabilizer: Tightly hoop the heavy stabilizer. This provides a secure foundation for the patch.
4)Add fabric: Place a top layer of fabric (such as a piece of black felt) on the hooped stabilizer. The fabric itself does not need to be hooped. If the fabric has a loose or fuzzy weave, place a layer of water-soluble fabric on top to prevent the stitches from sinking.
5)Embroider your design: Select your design and start the machine. The machine will embroider the design onto the fabric.
6)Finish: Remove the fabric from the hoop.
7)Add adhesive (optional): Iron a piece of heat-sensitive adhesive (HeatnBond) onto the back of the patch. This will permanently iron it onto your jacket or backpack. If you don't want it to come off, you can sew it on for a more secure fit.
1)Use an Appliqué Design: The embroidery file must be specifically digitized for appliqué. It will have specific steps:
2.What is a good embroidery machine?
Generally speaking, the more embroidery needles there are (the number of needles means that you can show off works with as many colors as the number of needles at a time without changing the thread), the more heads the embroidery machine has (the number of heads means how many works you can embroider at a time), the larger the embroidery area, and the faster the embroidery speed of the embroidery machine, the better the embroidery machine. But A"good"machine depends entirely on your budget and goals.
3.Can a sewing machine do embroidery?
YH-ES5 is both a fully functional sewing machine and a fully functional embroidery machine.
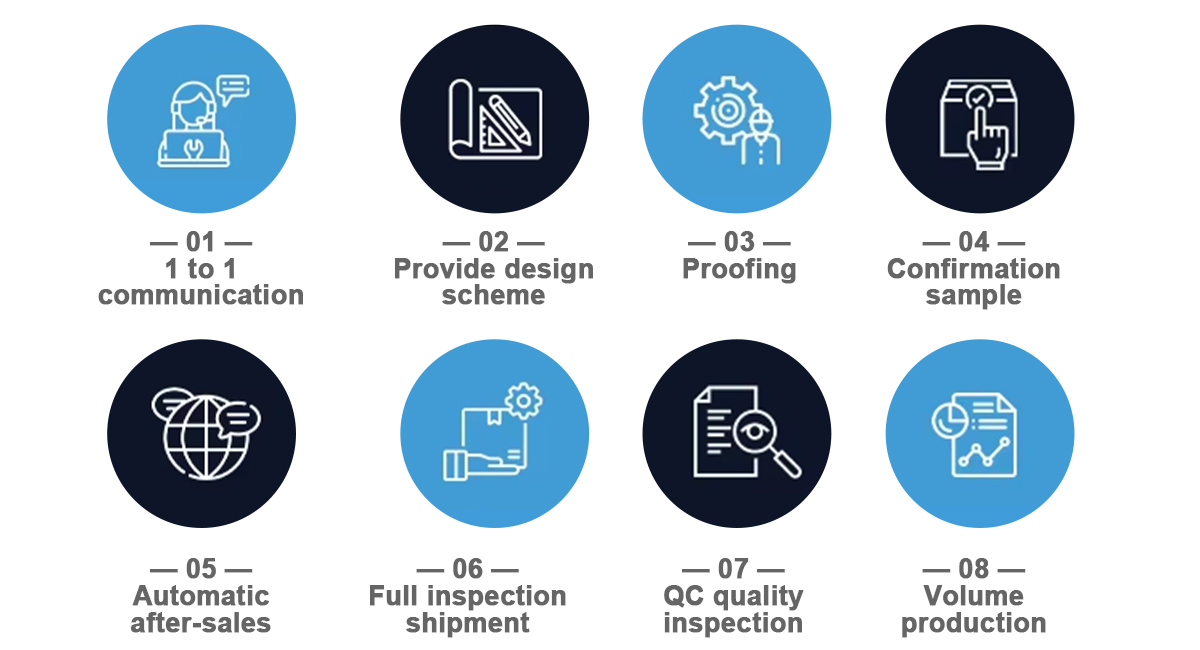
This is a simplified overview of the process from start to finish.

Send inquiry
/5