
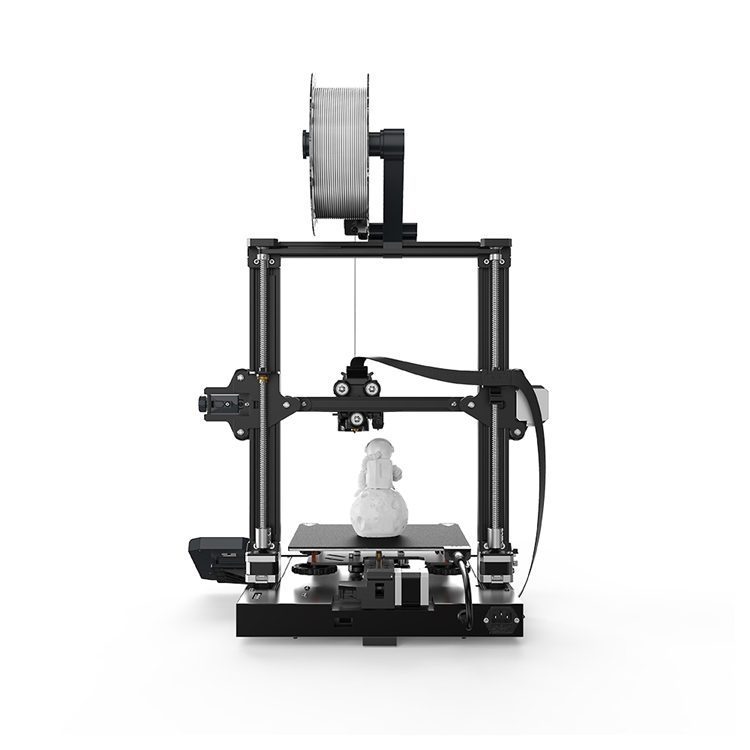
Impresora 3D Yinghe YH-3S1, una excelente impresora 3D para principiantes.
Impresora 3D Yinghe YH-3S1, una excelente impresora 3D para principiantes.
La impresora 3D YH-3s1 está diseñada específicamente para principiantes y entusiastas del bricolaje, con el objetivo de que todos puedan convertir sus ideas en realidad de manera fácil y sin preocupaciones. Combina un funcionamiento sencillo, un rendimiento estable y un precio asequible, lo que la convierte en la primera máquina ideal para iniciarse en el mundo de la impresión 3D. Este producto tiene una amplia gama de aplicaciones, principalmente en productos industriales, materiales, fabricación de maquinaria y moldes, educación, atención médica, animación y juguetes, fabricación y diseño artístico. Operación e impresión del producto.
El Yinghe YH-3S1 tiene las siguientes ventajas y características:
1.El YH-3S1Es el equipo de creación rápida de prototipos más económico.
2. El proceso de impresión es completamente automático y no requiere operación manual. Simplemente ingrese el archivo de diseño de secuencia de tareas en la impresora para imprimir el producto terminado.
3. El molde terminado tiene mayor precisión y es adecuado para procesos de tratamiento de superficies como pulido y galvanoplastia. Cualquier material ABS puede recibir tratamiento superficial.
4. El molde terminado tiene un punto de fusión de 170°C, lo que lo hace adecuado para taladrar, cortar y mecanizar.
5. El molde terminado tiene costos de impresión bajos, consumibles mínimos, control preciso del volumen de madera y prácticamente no hay desperdicio durante el proceso de impresión.

Especificaciones clave del producto de un vistazo:
- Volumen de construcción: 220 x 220 x 270 mm (suficiente para la mayoría de los proyectos creativos cotidianos)
- Rango de espesor de capa: 0,05 - 0,35 mm (desde detalles finos hasta borradores rápidos)
- Diámetro de la boquilla: 0,4 mm (estándar)
- Velocidad de impresión: ≤ 150 mm/s
- Conectividad: Admite impresión sin conexión mediante tarjeta TF, operación simple.
- Peso neto: 8,6 kg (Estructura robusta, fácil de mover)
¿Cómo utilizar YH-3S1 para impresión 3D?
Paso 1: Modelado digital 3D: impresión del "plano"
Deberá enviar un archivo al YH-3S1. Suele ser un archivo de modelo 3D, normalmente en formato .STL u .OBJ. Puede obtener este archivo de las siguientes maneras:
Descarga el modelo: descarga modelos compartidos de sitios como Thingiverse y Cults3D.
Crea tu propio modelo: crea tu propio modelo usando software como Blender, Fusion 360 o Tinkercad.
Este archivo de modelo define la apariencia y la forma del objeto, pero la impresora aún no puede leerlo directamente.
Paso 2: Cortar: Cortar el modelo 3D en varias capas de instrucciones
Este es el paso más crítico, realizado por un programa llamado "software de corte". Su función es exactamente la que su nombre indica:
"Rebanar": El software corta su modelo digital 3D horizontalmente, como si fuera una salchicha, en miles de rebanadas bidimensionales extremadamente delgadas. El grosor de cada corte depende de la altura de la capa que establezca, por ejemplo, 0,2 mm. Cuanto menor sea la altura de la capa, más suave será la superficie impresa.
Generación de ruta: para cada "capa", el software de corte calcula la ruta que debe moverse el cabezal de impresión. Determina qué áreas requieren material de relleno, qué áreas se quedan sin material y qué áreas requieren material de soporte adicional para soportar los voladizos.
Instrucciones de salida: en última instancia, el software de corte genera un archivo especial que contiene todas las instrucciones de movimiento, generalmente un archivo de código G. Este archivo detalla cada paso que realizará la impresora: las coordenadas a las que debe moverse el cabezal de impresión, la cantidad de filamento a extruir, las temperaturas del cabezal de impresión y la plataforma de construcción, etc.
Piense en el archivo de código G como la partitura musical de la impresora; la impresora simplemente lo reproduce fielmente.
Paso 3: Impresión y acumulación capa por capa: creación física
Una vez que la impresora recibe el archivo de código G, comienza la verdadera magia:
Alimentación: Se introduce un rollo de filamento de impresión de plástico en la extrusora.
Calentamiento y fusión: la extrusora empuja el filamento hacia el extremo caliente, calentando el plástico sólido y derritiéndolo en un líquido espeso y viscoso. Las temperaturas de impresión típicas rondan los 200°C.
Extrusión de precisión: el plástico fundido se extruye desde una boquilla en la parte inferior del extremo caliente. La boquilla se mueve a lo largo de los ejes X e Y, trazando la forma de la primera capa delgada sobre la base de impresión de acuerdo con las instrucciones del código G.
Enfriamiento y solidificación: el plástico extruido se enfría rápidamente, se adhiere a la base de impresión y se solidifica en la forma deseada.
Impresión capa por capa: después de imprimir la primera capa, la plataforma de construcción desciende ligeramente hasta la altura de la capa anterior y la boquilla se mueve nuevamente para extruir la segunda capa. La segunda capa se fusiona con la primera y el ciclo se repite.